Scheduling Tasks
Note
Excel and active reports are the only types of reports that can be scheduled.
-
Select the appropriate dataset.
-
Expand the relevant folder, left-click the report name and drag it into the Calendar.
At the exact point that you drag it onto will automatically populate the date and time in the pop-up window.
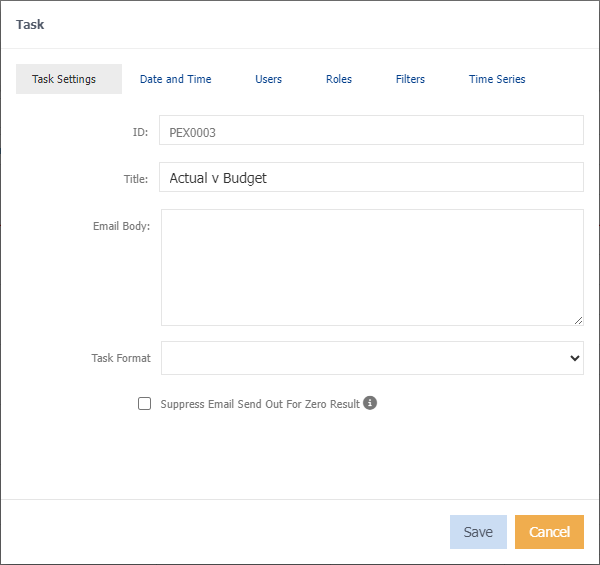
Task Settings
ID - is automatically generated and cannot be altered.
Title - the subject of your email.
Email Body - information that you want to relay to the user. If nothing is entered, the default text is "this has been sent via scheduler".
Task format - select either Excel or PDF for the format you want the report sent as.
Suppress Email Send Out for Zero Result - Unticked by default. Reports will not be sent if there is no data returned.
Date and Time
This is automatically populated based on when you drag and drop the report/alert. You can set the repeat function for how frequently you want the report to be sent and if you want the occurrence to end on a specific date.
Users
Choose who is to receive the report by email. You can send the report to as many users as you want by clicking the appropriate number of square tick boxes, but only one person can be selected for the "Run as" round tick box. This single person will receive any error messages that occur while the report is being emailed.
Filters
Apply any filters, these are in addition to the filters already applied to the report.
Time Series
Specify the time series of the report you have selected for the scheduler.
Use Calendar Period - When run, the task will use the current date as the period. Otherwise, the task time series will be used.
Use Previous Period - Use the period prior to the set task period.
-
Click Save
The report will now populate on the days you have selected. It will then appear as a blue rectangular box.
Edit a scheduled task
- Double click on the scheduled report,
or;
- Single click on the schedule report, press Enter on your keyboard.
Delete a scheduled task
- Hover your mouse over the scheduled report,
- Choose the cross in the right side of the box.
- Click Delete to confirm deletion,
Or;
- Single click on the scheduled report.
This will put a dark blue border around the box letting you know you have selected it.
- Press delete on your keyboard will do the same as above.