Administration / User Management

 save.
save.
 refresh screen.
 show disabled users, or
 hide disabled users.
Search users - searches the user name field
Right click menu options
Cell Editor - edit the cell contents.
Show Roles - display which roles the user has.
Reset Password - reset the user password, not applicable for SSO and Cloud Customers.
Update Profile Picture - Add a profile picture to the user.
Add User to Cloud - add the user to Cloud for authentication and authorisation.
Insert - Create a new user.
Remove - remove the selected user.
last Login Date
Displays when the user last logged in.
User Creation
- Scroll to bottom of user listing.
- Right click in the white space after the list of users.
- Click Insert.
-
Enter the relevant details for:
Username - enter as per Cloud username. Must be 15 characters or less.
Display Name - enter an alias, usually its the users first name and surname, for exmaple John Doe.
Email - Enter users email address as defined in Cloud.
Disabled - tick to disable a user.
2FA Method - 2 factor authentication method, used for Cloud customers for an added level of security when accessing MAGIQ Performance. Choose from Authy (Application) or email to receive verification codes.
Country Code - used in conjunction with the moble phone number and Authy App.
Mobile - enter the users mobile phone number, this is used for the Authy App to send verification codes.
SSO - tick to indicate that the user will be using Single Sign On.
Valid Cloud User - a tick will display if the user has been correctly setup for Cloud.
-
Click
to save.
Now that the user is created,
- Assign users to relevant roles, this makes applying permissions easier. Or, they will automatically inherit previously setup access.
- Permissions need to be assigned, if they have not been assigned to a role.
User Maintenance
Edit users details
- Click into the cell, make the change.
- Hit <enter> on your keyboard to "commit" the change.
- Click to save.
Delete a User
A user cannot be deleted if:
- They have at least 20 user parameters (USER_PARAMS table) which shows they are a user which has been logged in before.
- They are over a month old.
To delete a user:
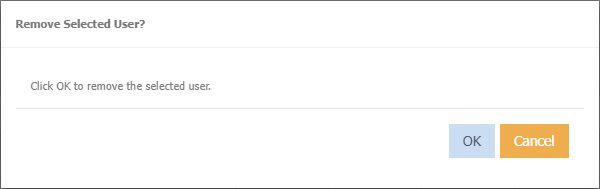
- Right click on the user name.
- Click Remove.
-
Click Ok on the below message.
-
Click
to save.
Disabling a user
- Tick 'Disabled' next to users name.
- The user will become disabled.
- Right click context menu has limited options available.
Import Users
This process is typically done at the initial setup time.
Note
- Users that are not included in the spreadsheet will be disabled.
- New users will be added.
- Click
 to download the export user listing as a template of how the users need to be created.
Once this spreadsheet is filled out.
to download the export user listing as a template of how the users need to be created.
Once this spreadsheet is filled out. - Add new users, delete old users to the spreadsheet and save.
- Click
 to import your new users.
 - Select your saved spreadsheet.
- Click Validate Data
- If you want to disable all existing users that are not in the spreadsheet then tick disable users not in import file
- Click Ok
Export User listing
Download a list of all users.
- Select
- Click Download
- Excel will open automatically displaying list of users.
Add a Profile Picture
- Right click next to users name
-
Choose Update Profile Picture
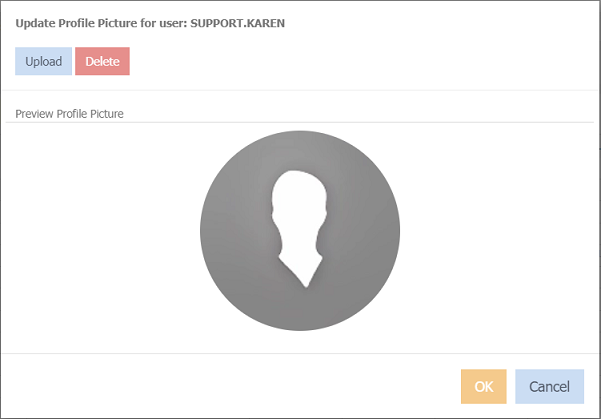
-
Click Upload
- Navigate to where your photo/image is.
- Click OK
Remove a Profile Picture
- Right click next to the users name
- Choose Update Profile Picture
- Click Delete
- Click Ok on the prompt of "Are you sure want to delete the profile picture".