Administration / Role Management
Creating roles is the easiest way to allocate permissions to users throughout the organisation as access is applied to the Role and the user automatically inherits what the Role has.
By default, a role called 'everyone' is provided.
A role can be determined by what the user does in the organisation, for example the Finance Manager, they could have a role called 'Finance'. Another example, a role called 'Payroll' which lists the users who would handle payroll but they would have nothing else to do with Human Resources etc
With a user assigned to a role, the role permission is appended to the existing individual permissions.
For example:
- Support.Albert has two roles: support and admin.
- Support.Albert has data access to Dataset A and D.
- Support role has data access to orgsniation A and B.
- Admin role has data access to organisation C.
The access for support.Albert is organisation A, B, C and D.
| User Name | Role | Role | |
|---|---|---|---|
| Support.Albert | Support | Admin | |
| Dataset A | D, I | D | |
| Dataset B | I | D | |
| Dataset C | I | D | |
| Dataset D | D |
D = direct permissions. I = indirect permission (permission appended)
To create a role
- Select Administration > Role Management from the left sidebar menu options
- Right click in the white area below the roles.
- Choose Insert
- Click in the cell of new role, enter the name of your role
- Hit enter
- Click

To add users to a role
- Select Administration > User Management from the left sidebar menu options.
- Right click on the user, choose Show Roles.
- Select/tick the box next to the role name.
- Click Ok.
- Repeat for all users
To view who has been assigned to the role
- Right click on the role.
- Choose Show Memembers
-
A list of users display with users that are assigned the role at the top.
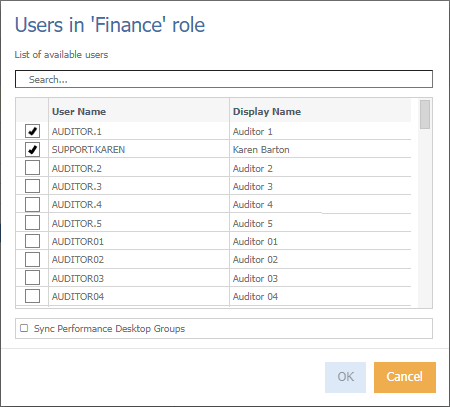
Sync Performance Desktop Groups - synchronises groups from the desktop application. Only used by consultants when moving over to the Cloud.