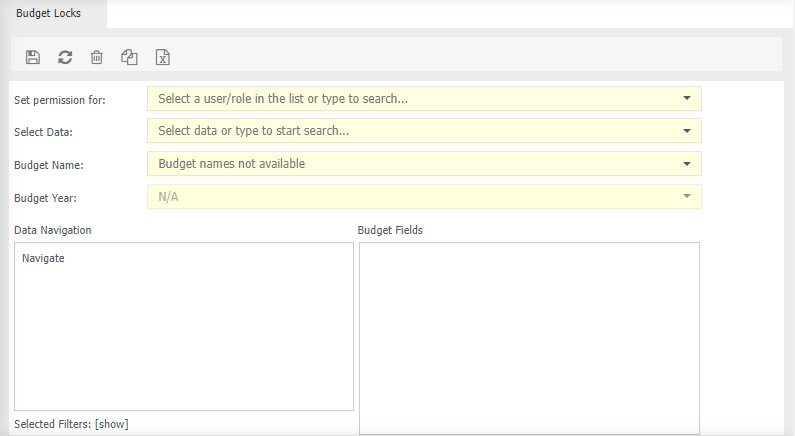
Permissions / Budget Locks
Controls access to budget entry during the budget preparation process.
Budget entry activity can be locked to certain users for:
- Layers in the navigation tree, eg cost centre and or salaries etc
- Specific columns displayed on the budget entry screen eg forecasts
If a layer and column in the budget screen has been locked this means that users can still view the budget entry but cannot make any changes.
 save.
save.
 refresh screen.
 removes any budget locks.
 copy permissions between users.
 export permissions to excel.
Set permission for - select either the individual user or a role to apply budget approval.
Select Data - seelct the relevant dataset, for exmaple, General Ledger.
Budget Name - select the relevant budget.
Budget Year - select which year you want to apply the lock.
Data Navigation - Filter Icons:
![]() indicates the user or role has access.
indicates the user or role has access.
![]() indicates the user or role does not have access.
indicates the user or role does not have access.
Budget Fields - Filter Icons:
![]() indicates the user or role has access.
indicates the user or role has access.
![]() indicate the user or role does not have access.
indicate the user or role does not have access.
Apply permissions to a user or role:
- From Set permission for, select an individual or a role.
- Select the data, for example General Ledger
- Select the Budget Name
- Select the Budget year, for example 2019/2020 You will now see the data navigation and budget fields display with information.
-
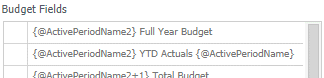
From the Budget Fields section
-
Click next to the field name to apply a lock that you do not want the user to edit.
Note
The fields of 'Full Year Budget' and 'YTD Actuals' are not required to be locked as these are reporting fields only.
-
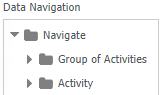
From the Navigate section, drill/navigate through the structure to display the relevant budget/cost centre.
-
Click the name of the budget to apply a lock that you do not want the user to edit.
-
Click
. - Repeat for each budget name and year.
Apply locks to another user or role using Copy Locks
- From Set permission for, choose the relevant user or role that you wish to copy from.
- Select the relevant data, budget name and year
- Click
 . To copy the locks made so they can be applied to other users or roles.
 - From Set permission for, choose the relevant user or role that you wish to copy to.
- Click
 . To copy the locks made so they can be applied to other users or roles.
 - Click .
Alternatively,
Copy user/role permissions from one user/role to another within the same dataset.
-
Click

From User/Role - choose the relevant user or role that you want to copy from.
To User/Role - choose the relevant user or role that you want to copy to.
Dataset - select the dataset.
Budget Name - choose which budget the permissions relate to.
Budget Year - choose which year the permissions relate to.
Copy Method - select either Merge with Existing Permissions, or Replace Existing Permissions
-
Click ok
Export permissions
Export permissions to excel to identify who has what.
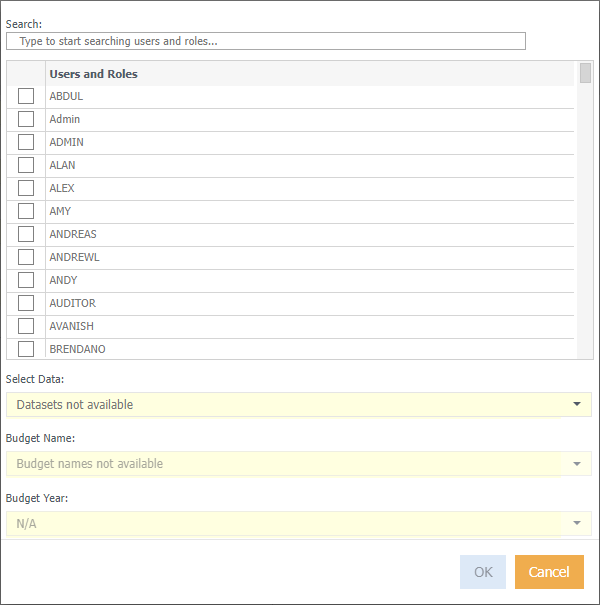
- Select the relevant user(s) or role
- Select the dataset
- Select the budget name
- Select the budget year
- Click Ok
- Click Download
Note
The permissions included in the export refer to:
D = Direct (applied on individual user).
I = Indirect (applied via a role).
I/D = Mixed (applied on individual user and role)